

When you're aiming for tender, juicy sliced pork belly, selecting the right cut is crucial. You're looking for 1-2 inch thick slabs with a generous layer of fat – this will help keep the meat moist during grilling. Now that you've got the right cut, it's time to prepare the meat. But what's the best approach to achieve that perfect balance of crispy skin and tender flesh? You'll want to know the right techniques for marinating, grilling, and checking for doneness to take your sliced pork belly to the next level – and we'll explore those techniques next.
Choosing the Right Cuts
When it comes to choosing the right cut of pork belly for grilling, you'll want to look for a slab that's roughly 1-2 inches thick.
This thickness allows for a nice balance between tender meat and crispy skin. Look for a cut that has a good layer of fat on the underside, as this will help keep the meat moist during the grilling process.
Opt for a skin-on cut, as this will provide the crispiest results.
If you can't find a skin-on cut, you can also use a skinless cut, but you'll need to adjust your grilling technique to prevent the meat from drying out.
In terms of specific cuts, you can look for pork belly slabs that are labeled as "grilling cuts" or "thick-cut" at your local butcher or grocery store.
Avoid cuts that are too thin or have too much bone, as these can be difficult to grill evenly.
Preparing the Meat
To properly prepare the meat for grilling, start by patting the pork belly dry with paper towels, making sure to remove excess moisture from the surface.
This step is crucial in achieving a nice crust on the outside and tender meat on the inside. Remove any silver skin or excess fat that you don't want to eat, as these can prevent even cooking.
Next, slice the pork belly into your desired thickness.
Keep in mind that thinner slices will cook faster, but may become overcooked if not monitored. Thicker slices will take longer to cook, but are less likely to become overcooked. Aim for slices that are around 1/4 inch thick, as these will provide the best balance between tenderness and flavor.
Make sure to handle the meat gently to avoid tearing or stretching the slices.
This will help the meat cook evenly and prevent it from becoming tough. By preparing the meat properly, you'll be able to achieve tender and juicy slices of pork belly that are perfect for grilling.
Marinating and Seasoning
Directly on the heels of preparing your pork belly comes the crucial step of marinating and seasoning.
You'll want to create a marinade that not only adds flavor but also helps to tenderize the meat. A combination of acidic ingredients like vinegar or citrus juice, along with oils and spices, will help break down the connective tissues in the pork belly.
When choosing a marinade, consider the flavor profile you want to achieve.
For a classic pork belly flavor, use a mixture of soy sauce, brown sugar, garlic, and black pepper. For a more adventurous flavor, try adding ingredients like Korean chili flakes, fish sauce, or citrus zest.
Whatever marinade you choose, make sure to coat the pork belly evenly and refrigerate it for at least a few hours or overnight.
Before refrigerating the pork belly, you can also add additional seasonings like salt, pepper, or herbs.
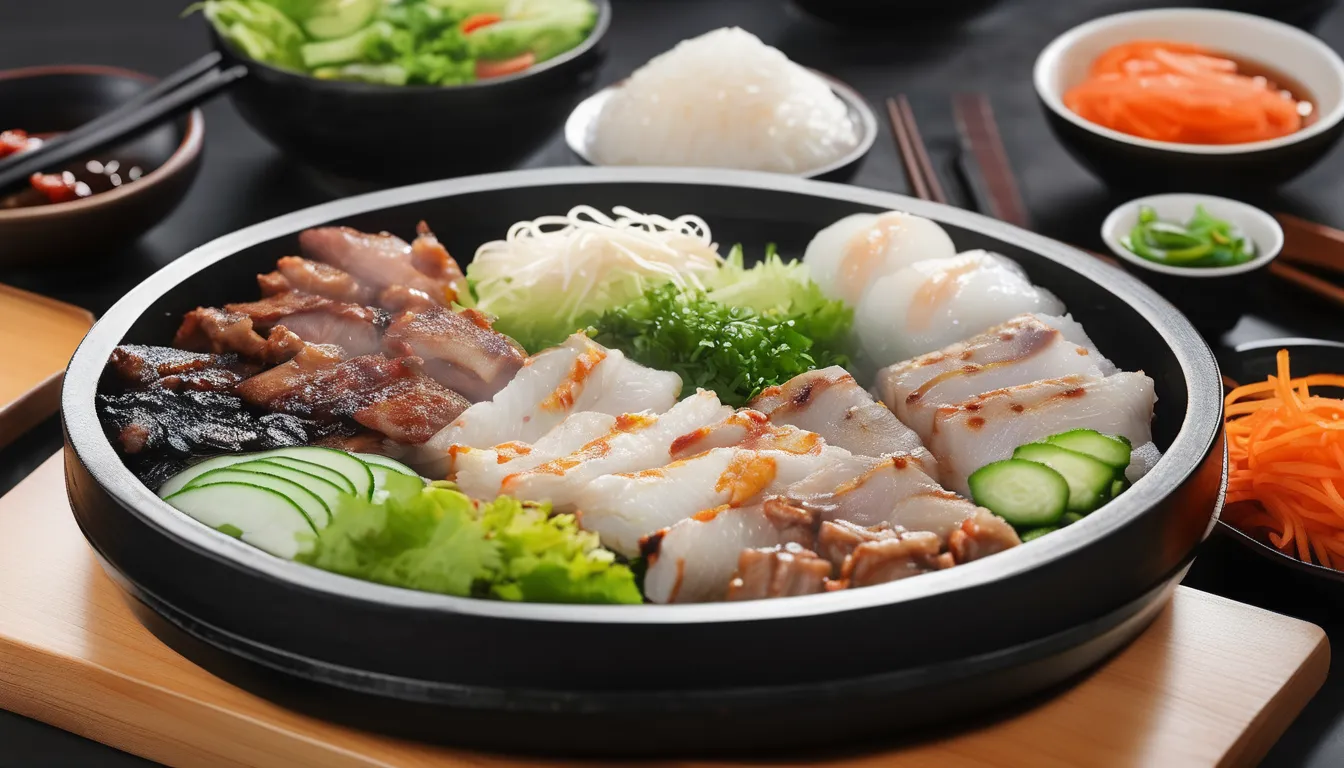
These will help enhance the flavor of the サムギョプサル 名古屋 and add texture. Remember to pat the meat dry with paper towels before refrigerating to prevent excess moisture from forming.
Grilling the Pork Belly
Grilling the pork belly requires attention to detail and a bit of patience, as you'll need to achieve that perfect balance of crispy, caramelized skin and tender, juicy meat.
To start, preheat your grill to medium-high heat, with the grates at least 4-5 inches away from the heat source. This will help prevent the skin from burning before it's fully cooked.
Once the grill is hot, remove the pork belly from the marinade, letting any excess liquid drip off.
Place the pork belly on the grill, skin side down, and close the lid. You want to sear the skin for about 5-7 minutes, or until it starts to develop a nice golden-brown color.
After the initial sear, reduce the heat to medium-low and continue grilling the pork belly for another 10-12 minutes per side, or until it reaches your desired level of crispiness on the skin.
Keep an eye on the pork belly as it grills, adjusting the heat as needed to prevent burning or flare-ups.
You can also rotate the pork belly 90 degrees to achieve those nice grill marks.
Achieving Perfect Doneness
Achieving perfect doneness in your grilled pork belly is crucial for an unforgettable dining experience.
You want the meat to be tender, juicy, and full of flavor. To achieve this, you'll need to cook the pork belly to the right internal temperature. Use a meat thermometer to check for doneness, aiming for an internal temperature of 160°F to 170°F (71°C to 77°C).
When you insert the thermometer, make sure it's in the thickest part of the meat, avoiding any fat or bone. If you don't have a thermometer, you can use the "press test" – press the meat gently with your finger or the back of a spatula.
If it feels soft and squishy, it's not done yet. If it feels firm but still yielding to pressure, it's perfectly cooked. Remember, overcooking will make the meat tough and dry.
Keep in mind that the pork belly will continue to cook a bit after you remove it from the grill, so it's better to err on the side of undercooking than overcooking.
Once you've achieved perfect doneness, let the meat rest for a few minutes before slicing and serving.
Conclusion
You've made it – perfectly grilled sliced pork belly is now within your reach. By selecting the right cut, preparing the meat with care, and marinating it in a flavorful blend, you set yourself up for success. Grilling with precision and attention to doneness ensures a tender, juicy result. With practice, you'll master the art of grilling sliced pork belly to perfection, impressing your guests and satisfying your cravings every time.